The Definitive Concretegrout Guide for Foundations
Read our comprehensive concretegrout guide to master substrate preparation, mixing techniques, and curing procedures for strong, durable structural foundations.
Table of Contents
- Substrate Preparation
- Formwork Design
- Mixing Protocols
- Curing Procedures
- Frequently Asked Questions
- Comparing Approaches
- Practical Tips
Article Snapshot

A concretegrout guide is a comprehensive instructional framework detailing the preparation, mixing, and placement of cementitious mixtures for structural foundations. It outlines critical substrate saturation, formwork clearance, and curing protocols necessary to prevent shrinkage and achieve optimal compressive strength in heavy-duty construction applications.
By the Numbers
- 18-24: Recommended hours of presoaking with water for concrete foundations before placing cementitious grout (Big League Construction Services, 2024)[2].
- 25: Typical millimeters of clearance required around baseplate edges to ensure proper flow (Big League Construction Services, 2024)[2].
- 5: Minimum minutes of mechanical mixing needed to activate non-shrink grout ingredients (SpecChem, 2023)[1].
- 100: Maximum millimeters of grout depth recommended in a single pour before using aggregate extension (Big League Construction Services, 2024)[2].
Introduction
The principles in this concretegrout guide form the backbone of reliable structural engineering and heavy machinery installation. When securing steel baseplates to concrete foundations, the integrity of the cementitious grout determines the longevity of the entire assembly. A poorly executed pour can lead to hairline cracks, voids, and catastrophic equipment failure. This article explores essential procedures for effective placement, drawing on industry standards for substrate preparation, material mixing, and environmental protection. Whether managing commercial foundation repair or installing precision cement for industrial turbines, understanding these core mechanics is vital. We will examine crucial steps from initial surface roughening to final curing, ensuring your structural grouting meets rigorous compressive strength thresholds.
Concretegrout Guide Fundamentals: Substrate Preparation
Proper preparation of the concrete substrate is the most critical step in preventing grout failure and ensuring a permanent bond. Before any material is poured, the bearing surface must be meticulously cleaned and roughened to remove laitance, dust, and oils. This mechanical profiling opens the pores of the foundation, allowing the cementitious grout to achieve a strong mechanical interlock.
Moisture management is equally vital. The substrate must undergo continuous saturation to prevent it from drawing water out of the fresh mix, which leads to plastic shrinkage. According to industry standards, “Cleaning, roughening, and presoaking the concrete substrate with water for 18–24 hours are essential steps to be taken before placing grout” (SpecChem, 2023)[1]. This extended saturation period ensures the foundation is thoroughly dampened. For detailed specifications, refer to this comprehensive cementitious grouting technical bulletin from industry manufacturers.
Immediately before placement, all free-standing water must be removed from the surface and any adjacent bolt holes. While the concrete should be saturated, it must not be swimming in water, as excess moisture can alter the water-cement ratio of the non-shrink grout. For those managing complex projects, reviewing various grouting project case studies can provide valuable context on how different environmental conditions affect substrate absorption rates. Proper execution of these preliminary steps guarantees that the material will cure uniformly and maintain its designed early strength.
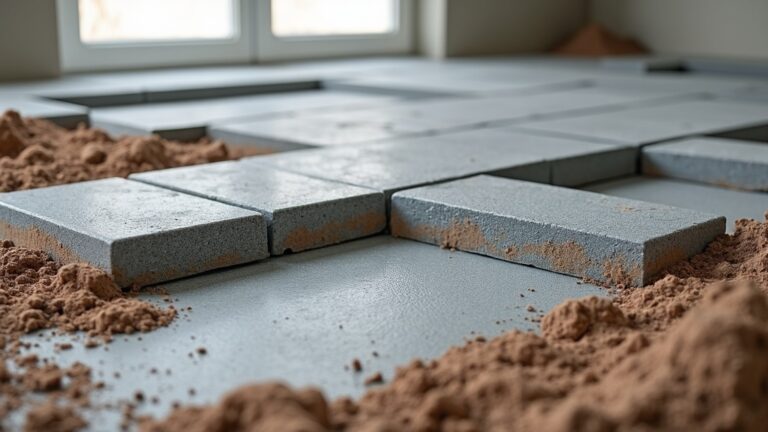
Formwork Design and Baseplate Clearance
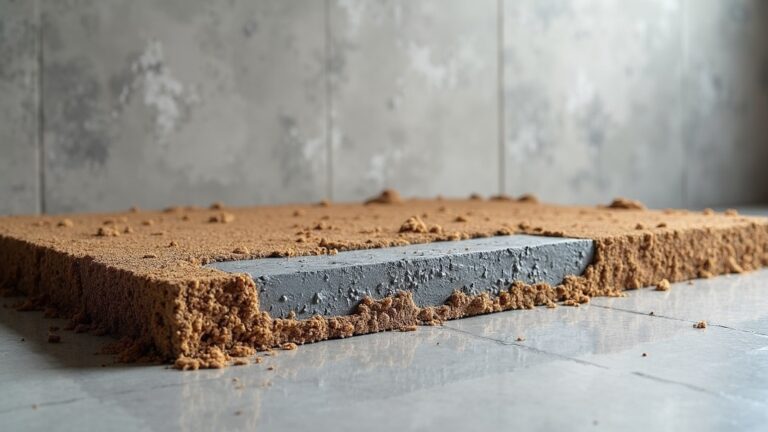
Constructing robust formwork with precise clearances ensures the fluid mixture flows completely beneath the baseplate without trapping air. The formwork must be strictly watertight to prevent the loss of cement paste, which would otherwise leave voids and compromise the compressive strength of the installation.
Adequate spacing is required to facilitate a continuous, unidirectional pour. A typical installation requires 25 millimeters of clearance around baseplate edges to ensure proper grout flow and complete bearing (Big League Construction Services, 2024)[2]. This perimeter gap allows the material to expand slightly and provides a visual confirmation that the void filling process is complete.
The depth of the pour is another critical dimension. While a minimum of 5 millimeters of grout thickness above the bottom of the baseplate is needed to ensure complete void filling, a general lower limit of 25 millimeters minimum grout depth is suggested to maintain long-term performance (SpecChem, 2023; Big League Construction Services, 2024)[1][2]. When building the forms, contractors should incorporate a head box or hopper on the leading edge. This creates hydrostatic pressure, forcing the precision cement mixture deep into the cavity and pushing out any entrapped air. Following this guide to concrete grout ensures that the load is transferred evenly across the entire bearing surface, preventing localized stress fractures in the underlying foundation.
Mechanical Mixing and Deep Pour Techniques
Achieving a uniform consistency through strict mechanical mixing protocols activates the non-shrink grout ingredients and prevents segregation during placement. Hand mixing is entirely inadequate for structural applications, as it fails to generate the shear forces necessary to fully wet the cement particles and disperse the fine aggregates.
Manufacturers mandate a specific mixing duration to guarantee optimal performance. A typical protocol requires 5 minutes of mechanical mixing to activate ingredients and achieve uniform consistency (SpecChem, 2023)[1]. Using a high-shear colloidal mixer or a heavy-duty paddle mixer ensures that the cementitious grout reaches a fluid, cohesive state without entraining excess air.
When dealing with deep foundations, the volume of the pour can generate significant heat of hydration, leading to thermal cracking. To mitigate this, aggregate extension is employed for deep pours. The recommended maximum single-lift depth for cementitious grout placements is 100 millimeters maximum grout depth in one pour (Big League Construction Services, 2024)[2]. For cavities exceeding this limit, clean, graded pea gravel can be added. The typical maximum proportion is 50 percent pea gravel by volume of grout mix (Big League Construction Services, 2024)[2]. This concrete grouting manual approach reduces heat buildup while maintaining the structural integrity of the matrix. For more details on mixing equipment, exploring introductory colloidal grout plant concepts can help contractors select the right machinery for high-volume structural grouting tasks.
Curing Procedures for Concretegrout Guide Applications
Implementing immediate and thorough curing procedures is mandatory to prevent moisture loss, which is the primary cause of shrinkage and hairline cracks. Once the material is placed and finished, the surface is highly vulnerable to rapid evaporation, especially in windy or low-humidity environments.
Industry experts emphasize that “The single biggest cause of hairline cracks and shrinkage in a high-quality cementitious grout is improper or nonexistent curing procedures” (Five Star Products, 2023)[3]. To counteract this, contractors must apply wet burlap, plastic sheeting, or a high-quality membrane-forming curing compound immediately after the final set. This traps the bleed water and allows the cement to fully hydrate, developing its target compressive strength.
Environmental temperature also plays a pivotal role in the curing process. The material must be protected from freezing temperatures until it reaches an early compressive strength level of 3,000 psi (SpecChem, 2023)[1]. During cold weather placements, the typical minimum grout temperature to be maintained after placement is 4 degrees Celsius (SpecChem, 2023)[1]. Insulated blankets or temporary enclosures with indirect heating may be required to maintain these conditions. Adhering to these grouting concrete guide protocols ensures the installation remains durable and resistant to dynamic operational loads over its entire service life.
Important Questions About the Concretegrout Guide
Why is presoaking the concrete substrate necessary before grouting?
Presoaking the concrete substrate is essential because dry concrete acts like a sponge, rapidly absorbing the mixing water from the fresh cementitious grout. This premature water loss disrupts the hydration process, leading to plastic shrinkage, reduced compressive strength, and potential bond failure. By saturating the foundation for 18 to 24 hours prior to placement, the substrate reaches a state of equilibrium. This ensures that the non-shrink grout retains its designed water-cement ratio, allowing it to flow properly, fill all voids, and cure into a dense, durable structural connection. Always remember to remove any free-standing water just before the pour.
What is the maximum depth for a single lift of cementitious grout?
The recommended maximum depth for a single lift of standard cementitious grout is typically 100 millimeters. Pouring thicker sections in a single pass can trap excessive heat generated by the cement hydration process, which may result in thermal cracking and compromised structural integrity. When the cavity depth exceeds this 100-millimeter limit, contractors must utilize aggregate extension techniques. This involves adding clean, washed pea gravel to the mixture, which acts as a heat sink and reduces the overall cement content per volume. Alternatively, the pour can be executed in multiple distinct lifts, allowing each layer to dissipate heat before the next is placed.
How long should non-shrink grout be mechanically mixed?
Non-shrink grout should be mechanically mixed for a minimum of five minutes to ensure all dry ingredients are fully wetted and uniformly dispersed. This extended mixing time is crucial for activating the specialized admixtures and expansive agents that give the material its non-shrink properties. Using a high-shear mixer or a heavy-duty paddle mixer is highly recommended over hand mixing, as mechanical agitation prevents the segregation of fine aggregates and minimizes unwanted air entrainment. Proper mixing guarantees a cohesive, fluid consistency that flows easily beneath baseplates and achieves the specified early strength required for heavy machinery installations.
At what compressive strength can grout be exposed to freezing temperatures?
Cementitious grout must be protected from freezing temperatures and significant vibration until it achieves a minimum early compressive strength of 3,000 psi. If the material freezes before reaching this critical threshold, the expansion of ice crystals within the pore structure will cause irreversible damage, severely reducing its final load-bearing capacity and durability. During cold weather construction, contractors must use insulated blankets, heated enclosures, or specialized accelerating admixtures to maintain the grout temperature above 4 degrees Celsius. Continuous temperature monitoring is essential to ensure the structural grouting matrix cures safely and develops its full design strength.
Comparing Grouting Approaches
Selecting the right methodology depends heavily on the specific load requirements, cavity depth, and environmental conditions of the project. While a standard cementitious mix is ideal for shallow applications, deeper voids and high-vibration environments demand modified approaches to ensure long-term stability. The following table outlines the primary methods detailed in this concretegrout guide.
| Approach | Best Application | Key Characteristic |
|---|---|---|
| Standard Cementitious | Shallow baseplates (<100mm) | High early strength, simple mixing |
| Aggregate-Extended | Deep pours (>100mm) | Pea gravel reduces heat of hydration |
| Epoxy Grout | High-vibration machinery | Chemical resistance, zero water absorption |
Understanding these distinctions allows engineers to specify the most appropriate material, ensuring optimal performance and longevity for the structural assembly.
Practical Tips for Successful Placement
To achieve flawless results on site, contractors should adopt a systematic approach to quality control. First, always conduct a trial batch to verify the flowability of the cementitious grout before committing to the full structural pour. This simple step reveals issues with water temperature or ambient conditions that might affect the final set.
Second, maintain a continuous, unidirectional flow during placement. Never pour from multiple sides simultaneously, as this traps air pockets beneath the baseplate and creates hidden voids that compromise the bearing surface. Utilizing a head box to maintain hydrostatic pressure is highly recommended for critical installations.
Finally, protect the freshly placed material from environmental extremes. In hot weather, use chilled mixing water and erect temporary sunshades. In cold conditions, pre-warm the substrate and utilize insulated curing blankets. By integrating these best practices, you align with the highest standards of any cementitious grout guide and ensure every installation stands the test of time.
The Bottom Line
Mastering the principles outlined in this concretegrout guide is essential for any professional involved in heavy construction and machinery installation. From meticulous substrate preparation and precise formwork design to strict mechanical mixing and rigorous curing protocols, every step directly impacts the structural integrity of the final assembly. By adhering to these proven methodologies, contractors can eliminate shrinkage, prevent hairline cracks, and guarantee complete bearing across all load-bearing surfaces. For more in-depth technical resources and equipment insights, continue to explore the comprehensive articles available on colloidalgroutplants.com to elevate your next structural grouting project.
Sources & Citations
- How to Grout: Essential Procedures for Effective Concrete Grouting. SpecChem.
https://specchem.com/resources/how-to-grout/ - Best Practices for Cementitious Grout Preparation and Placement. Big League Construction Services.
https://bigleaguecs.com/best-practices-for-cementitious-grout-preparation-and-placement/ - A Professional’s Handbook on Grouting and Concrete Repair. Five Star Products, Inc.
https://www.buildsite.com/pdf/fivestarproducts/Five-Star-59-Installation-Instructions-1095014.pdf
For more about Concretegrout guide, see Concretegrout Guide.