The Complete Grout Mixing Guide for Professionals
Discover our comprehensive grout mixing guide to achieve perfect tile joints. Learn precise ratios, mixing times, and expert techniques for long-lasting results.
Table of Contents
- Precise Proportions and Material Preparation
- Mechanical Agitation and Slaking Protocols
- Application Techniques and Working Time Management
- Troubleshooting Grout Mixing Defects and Curing Errors
- Questions from Our Readers
- Method Comparison
- Practical Tips
- Key Takeaways
Article Snapshot

A grout mixing guide is a structured instructional framework detailing the precise proportions, mechanical procedures, and curing protocols required to prepare cementitious tile joint compounds. This resource ensures installers achieve optimal compressive strength, color consistency, and long-term durability in residential and commercial flooring applications.
Quick Stats: Grout Mixing
- Manufacturers specify 3 to 5 minutes of initial mixing time to achieve a lump-free consistency (Mapei Corporation, 2024)[1].
- Freshly blended material requires a 5-minute slake time before final remixing and application (Mapei Corporation, 2024)[1].
- Improper blending and inaccurate water ratios account for over 50 percent of industry callback issues (National Tile Contractors Association, 2025)[4].
Introduction
The principles outlined in a professional grout mixing guide form the foundation of every successful tile installation. Whether working on a small residential bathroom or a large commercial floor, the quality of the joint compound dictates the longevity and aesthetics of the finished surface. Many installers underestimate the chemical reactions occurring within the bucket, leading to premature cracking, shading, and structural failure. This comprehensive overview explores the critical variables that influence compound performance, from water-to-powder ratios to mechanical agitation speeds. By understanding the microstructural changes that occur during the slaking and application phases, professionals can eliminate common callback issues and ensure client satisfaction. The following sections break down the essential preparation steps, mechanical mixing parameters, application techniques, and troubleshooting strategies necessary to achieve flawless, durable joints every time.
Precise Proportions and Material Preparation
Accurate measurement of raw materials is the most critical first step in any successful installation. When following a reliable grout mixing guide, installers must prioritize exactness over estimation. Eyeballing the components is a frequent error that compromises the final product. As Mark Pennine, Technical Manager at Mapei Corporation, notes, “When you are mixing grout, always measure your water and powder. Eyeballing it is the fastest way to end up with weak grout or color variation from batch to batch” (Mapei Corporation, 2024)[1]. For many standard cementitious products, manufacturers recommend approximately a 3:1 powder-to-water ratio by weight when preparing a full unit (Mapei Corporation, 2024)[1].
Applying the Grout Mixing Guide to Partial Batches
When project constraints require smaller batches, precision becomes even more vital. Technical specifications dictate that partial units must be weighed out carefully, maintaining a strict tolerance within about one percent of the full-unit ratio to preserve color consistency across the entire floor (Mapei Corporation, 2024)[1]. Beyond structural integrity, handling dry powders introduces occupational health considerations. The Occupational Safety and Health Administration warns that handling these materials can expose workers to respirable crystalline silica, recommending appropriate respiratory protection when airborne dust exceeds permissible limits (Occupational Safety and Health Administration, 2024)[2]. For large-scale commercial projects requiring continuous supply, exploring specialized equipment like colloidal grout plants can significantly improve batch consistency and worker safety. Proper material preparation ultimately dictates the chemical hydration process, ensuring the compound achieves its designed compressive strength and aesthetic uniformity.
Mechanical Agitation and Slaking Protocols
Proper mechanical agitation and mandatory rest periods transform dry powders into cohesive, workable compounds. A comprehensive grout preparation guide emphasizes that simply combining ingredients is insufficient; the physical action of the mixer dictates the microstructural development of the paste. Technical instructions typically specify mixing cementitious compounds for three to five minutes to achieve a completely homogeneous, lump-free consistency (Mapei Corporation, 2024)[1]. The speed of the drill or paddle is equally important. The Portland Cement Association indicates that mechanical agitation should occur at low speeds, typically under 500 rpm, to avoid entraining excessive air into the mixture (Portland Cement Association, 2025)[3]. Entrained air weakens the final cured joint and creates pinholes on the surface.
The physical design of the mixing paddle also plays a significant role. Installers should utilize a specialized blending paddle with a square head, rather than a standard paint mixer. These tools are engineered to fold the material from the bottom of the bucket upward, ensuring that dry pockets trapped near the base are fully incorporated without whipping excess air into the top layer. Once the initial blending is complete, the mixture must undergo a crucial resting phase. Manufacturers instruct that freshly blended material should rest, or slake, for about five minutes before being remixed and applied to the tile surface (Mapei Corporation, 2024)[1]. The National Tile Contractors Association emphasizes that allowing the material to slake before remixing is critical for avoiding shading or soft joints (National Tile Contractors Association, 2025)[4].
Application Techniques and Working Time Management
Managing the active working window ensures the compound fully penetrates the joints before initial set begins. The physical characteristics of the blended material must match the specific dimensions of the installation. Schluter-Systems Technical Services advises that the material “should be mixed to a consistency similar to peanut butter – thick enough to stay in the joint, but fluid enough to be worked into all voids without sagging” (Schluter-Systems North America, 2025)[5]. Achieving this precise viscosity requires strict adherence to the initial water measurements and thorough mechanical blending.
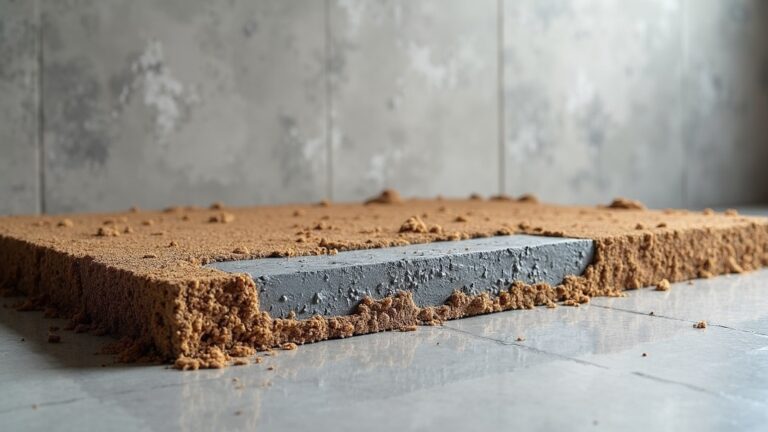
The dimensions of the tile assembly also influence the required stiffness of the mixture. The Tile Council of North America handbook notes that cementitious joints in typical floor assemblies are often specified between 3.2 and 6.4 millimeters wide, which directly influences how stiff or fluid the blend should be (Tile Council of North America, 2025)[6]. Wider joints generally require a slightly stiffer mixture to prevent sagging and shrinkage during the curing phase. Selecting the correct trowel is equally important for forcing the material deep into the crevices. A firm rubber float, held at a strict 45-degree angle, provides the necessary pressure to compact the mixture and eliminate hidden voids. Installers must also be highly conscious of the material’s pot life. Schluter-Systems recommends mixing small batches that can be placed within roughly 30 to 45 minutes, noting that typical working time is under an hour at room temperature (Schluter-Systems North America, 2025)[5]. For further technical details on joint widths and application methods, consulting the Portland Cement Association field practices provides invaluable insights into industry-standard methodologies.
Troubleshooting Grout Mixing Defects and Curing Errors
Identifying and correcting formulation errors early prevents long-term structural and aesthetic failures in tiled surfaces. Even minor deviations from a proven tile grout instructions manual can lead to significant callbacks. David R. Hattis, President of Building Technology Inc., explains that “a common cause of grout problems is improper mixing of grout with water – either too much or too little water can significantly affect strength, color uniformity, and durability” (Tile Council of North America, 2025)[7]. The consequences of adding excess liquid are severe and measurable. The Tile Council of North America notes that exceeding the recommended water content by as little as 10 percent can measurably reduce compressive strength and increase shrinkage (Tile Council of North America, 2025)[7].
This shrinkage manifests as hairline cracks, powdery surfaces, and severe color shading across the floor. Jeffrey A. Gilham, Senior Materials Engineer at the Portland Cement Association, highlights that proper blending directly controls the microstructure, governing long-term resistance to staining and cracking (Portland Cement Association, 2025)[3]. Another frequent defect linked to poor blending is efflorescence, a white, powdery deposit that migrates to the surface. This occurs when excess water dissolves soluble salts within the cement matrix and carries them upward during evaporation. By strictly controlling the liquid volume and ensuring thorough mechanical integration, installers reduce the porosity of the cured joint, limiting pathways for water migration and salt deposition. The National Tile Contractors Association reports that improper blending, including inaccurate water ratios and lack of slake time, is involved in more than 50 percent of callback issues reported by its members (National Tile Contractors Association, 2025)[4]. To avoid these costly mistakes, contractors should regularly review colloidal grout resources and manufacturer technical data sheets.
Questions from Our Readers
Why is the slaking period mandatory before application?
The slaking period, typically lasting five minutes, allows the cement particles and polymer additives to fully absorb the added water. This rest period initiates a uniform chemical hydration process throughout the entire batch. If you skip this step, the mixture will appear overly stiff, tempting installers to add extra water, which weakens the final cured joint. After resting, a brief secondary remix restores the ideal workable consistency without altering the critical water-to-powder ratio, ensuring optimal compressive strength and preventing color shading across the tiled surface.
Can I add more water if the mixture becomes too stiff?
No, you should never add water to a batch that has already begun to stiffen or set in the bucket. This practice, known as retempering, breaks the chemical bonds forming within the cementitious matrix. Adding extra liquid drastically reduces the compressive strength, increases shrinkage, and causes severe color inconsistencies. If the material exceeds its recommended 30 to 45-minute working window, it must be discarded entirely. Always mix smaller batches that you can comfortably apply within the active pot life to avoid waste and structural compromises.
What are the risks of using a high-speed drill for blending?
Using a high-speed drill introduces excessive air into the mixture, a phenomenon known as air entrainment. Mechanical agitation should remain under 500 rpm to maintain a dense, structurally sound compound. High speeds create microscopic air bubbles that weaken the cured joint, leading to a porous surface prone to cracking, staining, and moisture infiltration. Furthermore, aggressive blending can generate excess heat, which accelerates the chemical curing process and significantly reduces your working time. Always use a low-speed, high-torque drill with a specialized blending paddle.
How do I accurately prepare a partial bag for a small repair?
Preparing a partial batch requires strict adherence to weight measurements rather than volume. You must weigh both the dry powder and the water to maintain the manufacturer’s exact ratio, keeping the tolerance within one percent of the full-unit specifications. Using measuring cups for partial volumes often leads to inaccurate proportions due to powder settling and compaction. By utilizing a digital scale, you ensure the chemical balance remains intact, which is absolutely critical for matching the color and structural integrity of the existing surrounding joints.
Method Comparison
Selecting the right blending method directly impacts the structural integrity and aesthetic quality of the finished installation. While manual methods are accessible for minor repairs, mechanical approaches provide the consistency required for professional results. The following table outlines the primary methods utilized in the industry.
| Method | Speed and Effort | Air Entrainment Risk | Best Application |
|---|---|---|---|
| Manual Trowel | High effort, slow | Low | Small repairs, narrow joints |
| Low-Speed Mechanical | Low effort, fast | Minimal | Full rooms, commercial floors |
| High-Speed Mechanical | Low effort, very fast | High (Defective) | Avoid entirely for cementitious compounds |
Practical Tips
Achieving flawless results requires attention to environmental factors and job site preparation. Always ensure the tile edges are clean and free of dust, thinset residue, or sealers before applying the compound, as these contaminants prevent proper adhesion. Dampening the joints slightly with a sponge can prevent dry tiles from sucking moisture out of the mixture too quickly, which causes powdery, weak joints. However, avoid leaving standing water in the crevices, as this alters the local water-to-powder ratio.
Temperature control is another vital consideration. Extreme heat accelerates the curing process, drastically reducing your working window, while cold temperatures delay hydration and weaken early strength development. Aim to maintain the ambient room temperature between 65°F and 75°F during both the blending and curing phases. When working with large-format porcelain or natural stone, consider using a polymer-modified compound or a specialized liquid admixture instead of plain water to enhance flexibility and stain resistance. Following a reliable grout mixing tutorial will also remind you to clean your tools and buckets thoroughly between batches; even a small amount of dried, partially cured material from a previous batch can introduce hard lumps and disrupt the chemical balance of your fresh mixture.
Key Takeaways
Mastering the principles outlined in this grout mixing guide is essential for delivering durable, visually appealing tile installations. By strictly measuring materials, respecting slake times, and managing working windows, installers can eliminate the vast majority of common callback issues. Proper technique not only ensures structural longevity but also protects the aesthetic integrity of the entire project. For more in-depth technical articles and equipment insights, continue to explore the extensive resources available on colloidalgroutplants.com to elevate your professional flooring capabilities.
Useful Resources
- Mixing Partial Units of Grout: Technical Guidance. Mapei Corporation.
https://cdnmedia.mapei.com/docs/librariesprovider10/line-technical-documentation-documents/mixing-partial-units-of-grout.pdf - Silica in Construction. Occupational Safety and Health Administration (OSHA).
https://www.osha.gov/silica-crystalline/construction - Field Practices for Mixing Small-Batch Cementitious Grout. Portland Cement Association.
https://www.cement.org/learn/materials-applications/grouts-and-tiling/field-practices-grout-mixing - Best Practices for Mixing Cementitious Grout. National Tile Contractors Association.
https://www.tile-assn.com/page/mixing-grout-best-practices - Schluter Tips: Mixing Cement-Based Grout for Tiled Showers. Schluter-Systems North America.
https://www.schluter.com/schluter-us/en_US/support/articles/mixing-cement-grout-for-tile - TCNA Handbook for Ceramic, Glass, and Stone Tile Installation. Tile Council of North America.
https://www.tcnatile.com/products-and-services/publications/tcna-handbook.html - Causes of Grout Problems in Tile Installations. Tile Council of North America.
https://www.tcnatile.com/faqs/47-causes-of-grout-problems-in-tile-installations.html
For more about Groutmixing guide, see Groutmixing Guide.